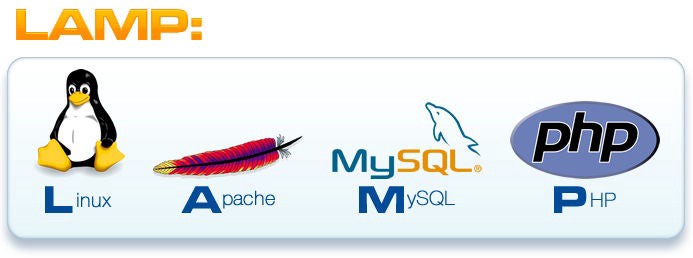
LAMP stack is a great way to get started with your first website using WordPress or other application that uses SQL, Apache, and PHP.
Step 1 – Apache Install & Firewall Rules
sudo apt update
sudo apt install apache2
The above command refreshes the repositories on Linux.
Now let’s make sure your ufw firewall is allowing traffic. You have 3 options Apache, Apache Full, and Apache Secure
Apache = Port 80
Apache Full = Port 80, 443
Apache Secure = Port 443
sudo ufw app list## Output
Available applications:
Apache
Apache Full
Apache Secure
OpenSSHNow let’s use Apache Full since we will use Lets Encrypt to secure our website behind HTTPS. Remember this is Linux so it’s case sensitive.
sudo ufw allow "Apache Full"Now browse to either IP or domain and you should see the Apache2 default page. To find your public IP address you can go to www.whatismyipaddress.com or through Linux terminal type.
dig +short myip.opendns.com @resolver1.opendns.comStep 2 – MYSQL
Let’s get started with another repository update and then install MySQL
sudo apt update
sudo apt install mysql-server
Now let’s configure MySQL
sudo mysql_secure_installationThe installation will ask if you want to configure VALIDATE PASSWORD PLUGIN. This plugin requires certain criteria for passwords but oftentimes this just causes issues in other areas. Just press enter to skip and make sure when creating passwords to document them and use strong passwords.
For the rest of the prompts just press Y to remove default users and database.
Now let’s test to make sure MySQL is working properly
sudo mysql## Output
Welcome to the MySQL monitor. Commands end with ; or \g.
Your MySQL connection id is 1254
Server version: 8.0.26-0ubuntu0.20.04.2 (Ubuntu)
Copyright (c) 2000, 2021, Oracle and/or its affiliates.
Oracle is a registered trademark of Oracle Corporation and/or its
affiliates. Other names may be trademarks of their respective
owners.
Type 'help;' or '\h' for help. Type '\c' to clear the current input statement.
mysql>
If the above is what you see you can exit MySQL
mysql> exitStep 3 – PHP Install
Setting up PHP can be daunting because there are so many different plugins used for many different applications. We will set up the basics.
sudo apt install php libapache2-mod-php php-mysqlNow let’s restart apache2 and check its status.
sudo systemctl restart apache2
sudo systemctl status apache2
● apache2.service - The Apache HTTP Server
Loaded: loaded (/lib/systemd/system/apache2.service; enabled; vendor preset: enabled)
Active: active (running) since Sun 2021-08-08 05:59:29 UTC; 11h ago
Docs: https://httpd.apache.org/docs/2.4/
Process: 22902 ExecStart=/usr/sbin/apachectl start (code=exited, status=0/SUCCESS)
Main PID: 22906 (apache2)
Tasks: 11 (limit: 9257)
CGroup: /system.slice/apache2.service
├─22906 /usr/sbin/apache2 -k start
├─23059 /usr/sbin/apache2 -k start
├─23534 /usr/sbin/apache2 -k start
├─24779 /usr/sbin/apache2 -k start
├─24821 /usr/sbin/apache2 -k start
├─24886 /usr/sbin/apache2 -k start
├─25286 /usr/sbin/apache2 -k start
├─25373 /usr/sbin/apache2 -k start
├─25565 /usr/sbin/apache2 -k start
├─25590 /usr/sbin/apache2 -k start
└─25594 /usr/sbin/apache2 -k start
If your screen looks similar to the above we can move forward.
Step 4 – Virtual Hosts in Apache
Virtual hosts help direct your domain to the correct directory within Apache. For this tutorial, we will use the domain lampsetup.com
sudo mkdir /var/www/lampsetupNow let’s change ownership from the webserver to you.
sudo chown -R $USER:$USER /var/www/lampsetupNow permissions
sudo chmod -R 755 /var/www/lampsetupWe should go ahead and create the index.html file to verify everything is working correctly.
sudo nano /var/www/lampsetup/index.htmlInsert HTML
<html>
    <head>
        <title>LAMP SETUP!</title>
    </head>
    <body>
        Well we know APACHE IS WORKING!
    </body>
</html>
Creating the sites-available will help point your domain to the correct directory
sudo nano /etc/apache2/sites-available/lampsetup.confCopy the below code with your own information
<VirtualHost *:80>
    ServerAdmin webmaster@lampsetup.com
    ServerName lampsetup.com
    ServerAlias www.lampsetup.com
    DocumentRoot /var/www/lampsetup
    ErrorLog ${APACHE_LOG_DIR}/error.log
    CustomLog ${APACHE_LOG_DIR}/access.log combined
</VirtualHost>
We need to enable your configuration and disabled any configuration currently defaulted.
sudo a2ensite lampsetup.conf
sudo a2dissite 000-default.conf
Let’s restart Apache and then test PHP
sudo systemctl restart apache2
sudo apache2ctl configtest
Config test output might have a localhost error but that’s fine and can be ignored. What we want to see is Syntax OK
Output
AH00558: apache2: Could not reliably determine the server's fully qualified domain name, using 127.0.0.1. Set the 'ServerName' directive globally to suppress this message
Syntax OK
Let’s remove that default index file
sudo rm /var/www/lampsetup/index.htmlLet’s test PHP!
sudo nano /var/www/lampsetup/info.phpPaste the below code into the info.php
<?php
phpinfo();
Should see the PHP Version page with all of the configurations.
Step 5 – Lets Encrypt
Now let’s secure our website behind HTTPS.
We need to install the certbot for apache
sudo apt install python3-certbot-apacheStep 6 – SSL Cert Installation
Let’s request the SSL Cert from Lets Encrypt
sudo certbot --apache -d lampsetup.com -d www.lampsetup.comOnce you do this you will be asked if you want redirection or not. I prefer redirection if you always want users to use HTTPS. This choice is up to you.
Output
Please choose whether or not to redirect HTTP traffic to HTTPS, removing HTTP access.
-------------------------------------------------------------------------------
1: No redirect - Make no further changes to the webserver configuration.
2: Redirect - Make all requests redirect to secure HTTPS access. Choose this for
new sites, or if you're confident your site works on HTTPS. You can undo this
change by editing your web server's configuration.
-------------------------------------------------------------------------------
Select the appropriate number [1-2] then [enter] (press 'c' to cancel):
From here you will get confirmation that your certificate is installed. Certbot will auto-renew this certificate and email you if there are any problems.
Thats it!
Now you are ready to move on to installing WordPress or whatever other application/web host you want to set up. Feel free to contact me if you have any questions and I will try to answer them.